May 22, 2022 By Team YoungWonks *
Java is a very popular programming language running on billions of devices. This tutorial assumes that the reader has some knowledge of Java syntax and object oriented programming (OOP). Such programming revolves around the attributes (also called instance variables) of objects and their behaviour. The data types help us declare the attributes and the methods define the behaviour of the objects. A very basic Java class usually looks like this:
class Program{
public static void main(String[] args) {
System.out.println("Hello World");
}
}
The platform independent Java code written above is called source code. This is human readable code and the machine doesn’t understand any of it. So, we install the JDK on our system, compile the source code to generate the byte code in the form of class files that the machine can understand and run using the Java Virtual Machine. This is usually the workflow for every Java programmer on the command line.
Processing is an open-source Graphical User Interface (GUI) software built on Java that was officially launched in the year 2001. It is used by designers, students and artists for the purposes of learning and creating art. In Processing, the programs are called sketches and are stored in a sketchbook as a folder on the computer. This helps the developer draw 2D and 3D graphics and the renderers are accelerated through OpenGL compatible graphics card. Processing enables playing sounds and offers different programming modes. These modes help the developers deploy their sketches on different platforms including Linux.
The Java Mode
Processing uses Java mode by default and it not only allows the programmers to write code to draw a variety of shapes, but also enables them to write a complex program. This library provides functions that can be used to work with images, keyboard events, mouse events, files, cameras and many other hardware components.
Since Java applets are no longer supported by the web browsers, the Processing library converts the Java code to JavaScript code so that the web browser can run the project as an application.
The Basics
Processing has the size() function that’s used to set the size of the sketch. It uses the P2D as the default renderer that is suitable for two-dimensional shapes. The code written in the setup() function gets executed automatically by the Processing software and the developer doesn’t need to call this function manually. The Processing IDE shows syntax errors on the message area when it is unable to compile the code. Just like in most of the programming languages, we start with the Hello World program, in Processing, we start by making an empty window of certain size.
void setup() {
size(400, 400);
}
The above code is the same as writing:
void setup () {
size(400, 400, P2D);
}
The third parameter can be any of the four built-in renderers. More information about these renderers can be sought from the official documentation of Processing library.
It is important to note that Processing uses the Cartesian coordinate system. The origin is in the top-left corner which means that if the sketch width is 300px and the height is 400px, then (0, 0) is the top-left corner and (300, 400) is the bottom-right corner. Since a pixel always uses the coordinates as its top-left corner, the bottom-right corner of the window shows the last pixel at (299, 399).
To better understand how Processing sketches are related to Java programs, let’s work on the Pong project.
The Pong Project
Most of us are aware of the Pong game. For those who are not, here is some information: the Pong game can be played by two players and each player needs to control a paddle. There is a ball that is placed at the center of the screen and it moves towards one of the players. When the player misses hitting the ball with the paddle, the other player gets a point. The player who reaches the winning score first wins the game.
We are going to develop this game in Java mode of Processing. The following steps should help one understand how to develop a game of this type.
Step 1: Create the sketch
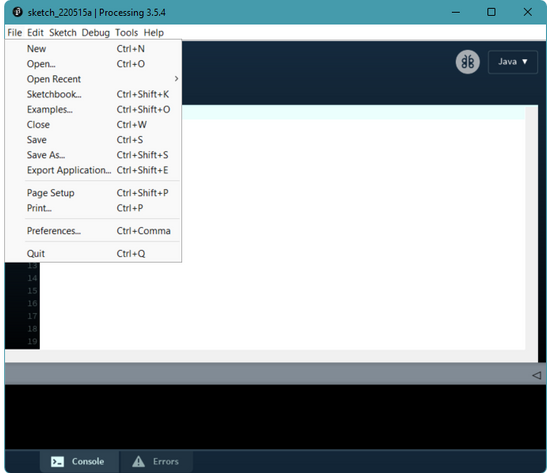
For this project, we do not need a complicated development environment. Simply, launch the Processing software (also called Processing IDE) on the computer after getting it downloaded it from their website (https://processing.org). From the Menu bar, go to File and choose Save option (You can also use a keyboard shortcut based on the operating system). Choose the desired location and give it a file name of your choice. We have named it Pong and are going to have the Paddle and Ball as the data structures in this project.
Step 2: The Paddle class
To work with the paddles, we will use x, y, speed, score, moveUp, moveDown, paddleWidth, and paddleHeight as instance variables. It is important to note that width and height variables are built-in Processing global variables that represent the width and height of the Processing sketch. Thus, we should not use width and height as our instance variables. We have the parametric constructor to initialize the x and y coordinates of the paddles. The drawAndMove method draws the paddle and uses the moveUp and moveDown instance variables to change its vertical position. We added conditional statements to make sure that the paddles don’t go outside the screen. To keep the code short and simple, we have not used any access modifiers in our classes.
class Paddle {
int x, y, speed, score, paddleWidth, paddleHeight;
boolean moveUp, moveDown;
Paddle(int x, int y) {
this.x = x;
this.y = y;
this.speed = 10;
this.score = 0;
this.moveUp = false;
this.moveDown = false;
this.paddleWidth = 20;
this.paddleHeight = 100;
}
void drawAndMove() {
rect(this.x, this.y, this.paddleWidth, this.paddleHeight);
if (this.moveUp) {
this.y -= this.speed;
}
if (this.moveDown) {
this.y += this.speed;
}
if (this.y <= 0) {
this.y = 0;
}
if (this.y >= height - this.paddleHeight) {
this.y = height - this.paddleHeight;
}
}
}

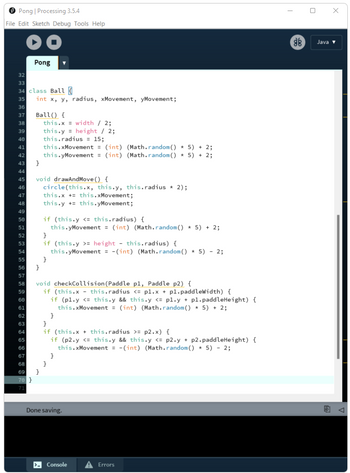
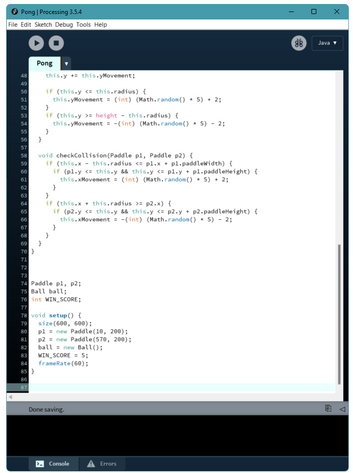
Step 3: The Ball class
The ball in the game needs to have x, y, radius, xMovement and yMovement as its instance variables. We have written the default constructor to put the ball at the center of the window using the width and height global variables of Processing. The ball moves with random speed in x and y directions using type casting and the random method of the Math class. The drawAndMove method draws the ball and moves it along the x and y axes. The ball bounces when it hits the top or bottom edges of the screen and its speed is randomized to make the game more interesting to play. The checkCollision method checks if the ball hits any of the two paddles and bounces with a random speed.
class Ball {
int x, y, radius, xMovement, yMovement;
Ball() {
this.x = width / 2;
this.y = height / 2;
this.radius = 15;
this.xMovement = (int) (Math.random() * 5) + 2;
this.yMovement = (int) (Math.random() * 5) + 2;
}
void drawAndMove() {
circle(this.x, this.y, this.radius * 2);
this.x += this.xMovement;
this.y += this.yMovement;
if (this.y <= this.radius) {
this.yMovement = (int) (Math.random() * 5) + 2;
}
if (this.y >= height - this.radius) {
this.yMovement = -(int) (Math.random() * 5) - 2;
}
}
void checkCollision(Paddle p1, Paddle p2) {
if (this.x - this.radius <= p1.x + p1.paddleWidth) {
if (p1.y <= this.y && this.y <= p1.y + p1.paddleHeight) {
this.xMovement = (int) (Math.random() * 5) + 2;
}
}
if (this.x + this.radius >= p2.x) {
if (p2.y <= this.y && this.y <= p2.y + p2.paddleHeight) {
this.xMovement = -(int) (Math.random() * 5) - 2;
}
}
}
}

Step 4: References, variables and the setup function
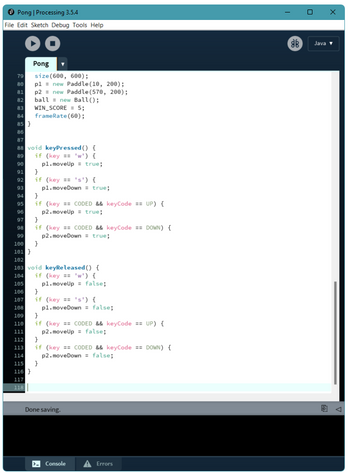
We have declared two references of Paddle type for the paddles, one reference of Ball type for the ball and an int variable to store the winning score. The setup() function creates the sketch window that is 600px wide and 600px in height. It instantiates the paddles and the ball as well as sets the winning score. The frameRate() function is used the set the frames per second.
Paddle p1, p2;
Ball ball;
int WIN_SCORE;
void setup() {
size(600, 600);
p1 = new Paddle(10, 200);
p2 = new Paddle(570, 200);
ball = new Ball();
WIN_SCORE = 5;
frameRate(60);
}
Step 5: The keyPressed and keyReleased functions
The paddles are controlled with the keys of the keyboard. From the Paddle class, it is clear that each paddle can move up or down. For the first player, we are using the w and s keys to move it up and down respectively. The other player uses the up and down arrow keys. Since these are special keys, we have a special way to check if these are pressed or released.
void keyPressed() {
if (key == 'w') {
p1.moveUp = true;
}
if (key == 's') {
p1.moveDown = true;
}
if (key == CODED && keyCode == UP) {
p2.moveUp = true;
}
if (key == CODED && keyCode == DOWN) {
p2.moveDown = true;
}
}
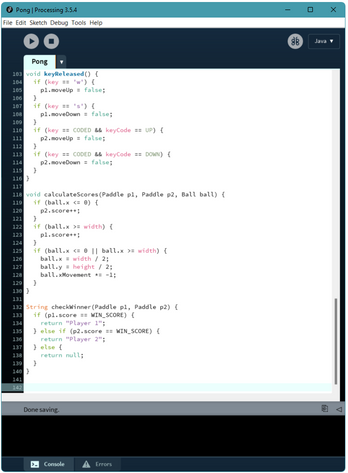
void keyReleased() {
if (key == 'w') {
p1.moveUp = false;
}
if (key == 's') {
p1.moveDown = false;
}
if (key == CODED && keyCode == UP) {
p2.moveUp = false;
}
if (key == CODED && keyCode == DOWN) {
p2.moveDown = false;
}
}
We can let the players control one of the paddles using the mousePressed and mouseReleased functions along with the mousex and mousey global variables.
Step 6: Calculation of scores
The calculateScores() function needs the two paddles and the ball as its arguments to calculate the scores of the players. Whenever the player is unable to hit the ball with the paddle and the ball goes outside the screen, the other player gets a point. The ball is placed back at the center and its direction is reversed so that the player who got the point needs to hit the ball now.
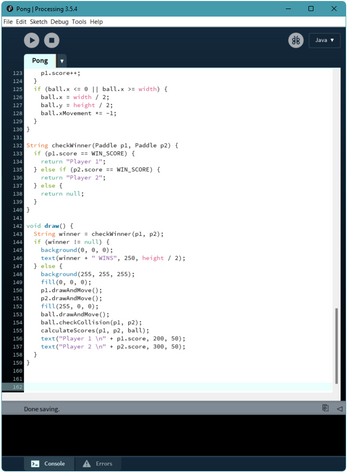
void calculateScores(Paddle p1, Paddle p2, Ball ball) {
if (ball.x <= 0) {
p2.score++;
}
if (ball.x >= width) {
p1.score++;
}
if (ball.x <= 0 || ball.x >= width) {
ball.x = width / 2; ball.y = height / 2; ball.xMovement *= -1;
}
}

Step 7: Checking the winner
The player who reaches the winning score first wins the game. The checkWinner() function returns the name of the winner. This function returns null if none of the two players have reached the winning score.
String checkWinner(Paddle p1, Paddle p2) {
if (p1.score == WIN_SCORE) {
return "Player 1";
}
else if (p2.score == WIN_SCORE) {
return "Player 2";
}
else {
return null;
}
}
Step 8: The draw function
The draw() function repeatedly gets called by the Processing software. This is where we have called the built-in functions, our functions and the methods of the above classes. The text() function displays the name of the winner using the winner variable. If none of the two players have reached the winning score, the game continues using the methods of the Paddle and Ball classes in the else block. The background of the sketch is set to white using its RGB value and the fill function fills the paddles with black color and the ball with red color. The players can see their scores throughout the game at the top-center of the sketch.
void draw() {
String winner = checkWinner(p1, p2);
if (winner != null) {
background(0, 0, 0);
text(winner + " WINS", 250, height / 2);
}
else {
background(255, 255, 255);
fill(0, 0, 0);
p1.drawAndMove();
p2.drawAndMove();
fill(255, 0, 0);
ball.drawAndMove();
ball.checkCollision(p1, p2);
calculateScores(p1, p2, ball);
text("Player 1 \n" + p1.score, 200, 50);
text("Player 2 \n" + p2.score, 300, 50);
}
}


Step 9: Extend the project
The Pong game designed and developed for this article works for two players. It can be extended or modified according to the needs of the programmer. It will be fun to have a one player game mode that has the other paddle controlled by the computer. The project may even have a new class to organize the main sections of the code and have subclasses for specialized Pong versions. Additionally, if the players intend to have this game played over a network, then multi-threading need to implemented to send and receive the game state.
Processing for Android
The Processing programming environment uses Java mode by default but is not limited to it. It now offers Android mode as well that adds all the features needed to run its sketches on Android devices. Emulators are also supported in case the developer doesn’t own an Android device. The apps that can be created also include watch faces, live wallpapers and Virtual Reality (VR) apps. One can export such apps directly to the Google Play Store without much effort. More information on how to use Processing for Android can be found at https://android.processing.org.
*Contributors: Written by Rohit Budania; Lead image by Shivendra Singh