May 06, 2021 By Team YoungWonks *
What is Raspberry Pi 4 and where is it used? How is it used? Many young makers who are just starting out will have this query. Read this blog to know the answers. In this blog, we shall cover what Raspberry Pi 4 is, where it is used and how one can unbox it, set it up and write the first program.
What is Raspberry Pi 4?
Raspberry Pi refers to a series of small single-board computers developed in the United Kingdom by the Raspberry Pi Foundation in association with Broadcom. The boards have been made keeping in mind the promotion of teaching basic computer science to kids. There are several models of the Raspberry Pi available today; in this video we shall be looking at the Raspberry Pi 4.
A microcontroller board built on silicon and designed at the Raspberry Pi Foundation, Raspberry Pi 4 is commonly used in robotics. Like its predecessors, it too plugs into a computer monitor or TV, and uses a standard keyboard and mouse. Enabling people of all ages to learn how to program in languages such as Scratch and Python, it can do the tasks you can perform with a desktop computer be it browsing the internet and playing high-definition video, or making spreadsheets, word-processing, and playing games. Its features include 1GB, 2GB, or 4GB RAM (LPDDR4), two USB 3.0 ports and two USB 2.0 ports, DSI display port, CSI camera port, Gigabit Ethernet, 40-pin GPIO header, 1.5GHz 64-bit quad-core ARM Cortex-A72 CPU (ARM v8, BCM2837), On-board Bluetooth 5.0 and n-board wireless LAN (dual-band 802.11 b/g/n/ac).
Raspberry Pi 4 projects
Since Raspberry Pi 4 is the first Pi that supports two screens at one time (right up to dual 4K@30 displays), it is great for people who want more desktop space. It is ideal for projects as simple as fashioning routers, file servers, retro games consoles; plus it can be used to make stop motion films, robots, smart mirrors, home security systems, home automation systems, virtual jukeboxes and so on.
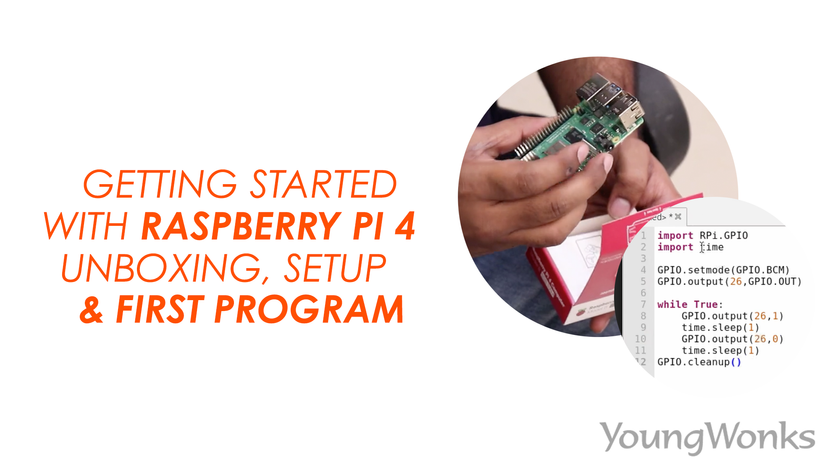
Getting Started with Raspberry Pi 4: Unboxing, Setup and Writing the First Program
In this video we shall see how to unbox, set up and write the first program to light an LED with Raspberry Pi 4.
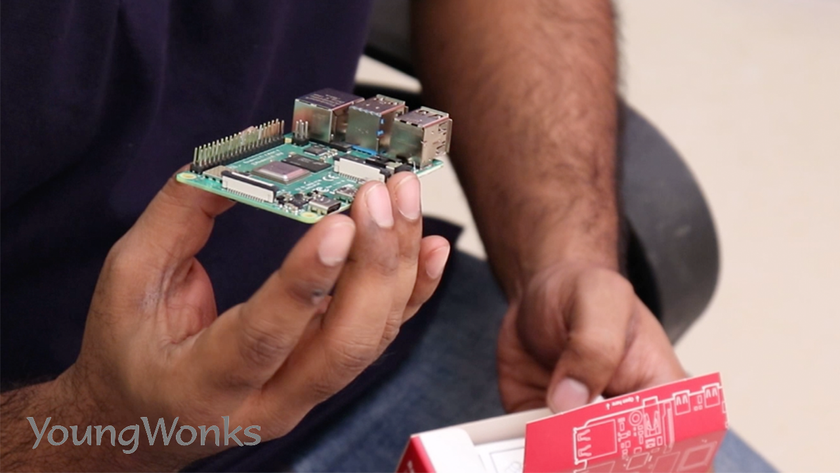
While the Raspberry Pi 4 featured here is an 8GB variant, the unboxing, set up and first program do not vary for other variants or even for Raspberry Pi 3 Model B+.
It is recommended that one uses the official Raspberry Pi power adaptor as it provides the required amount of power for it to run properly.
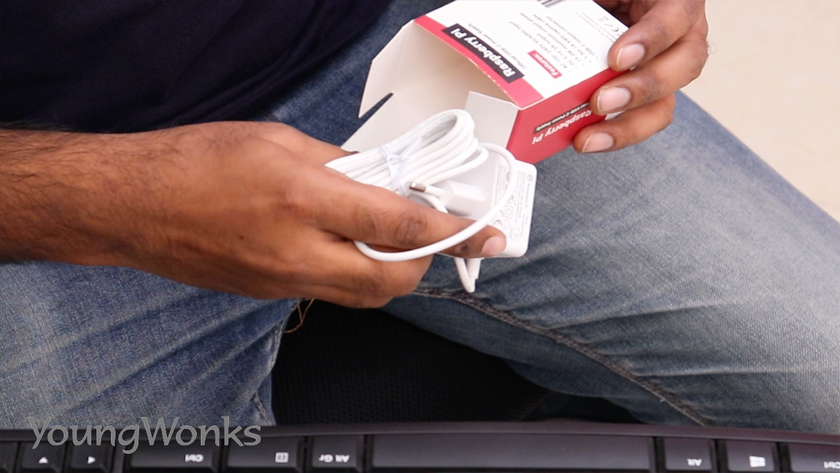
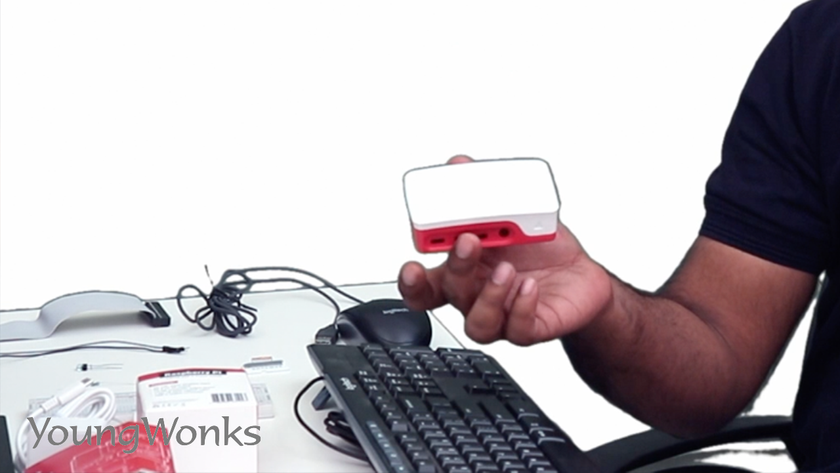
Along with this, you get the official Raspberry Pi official case.
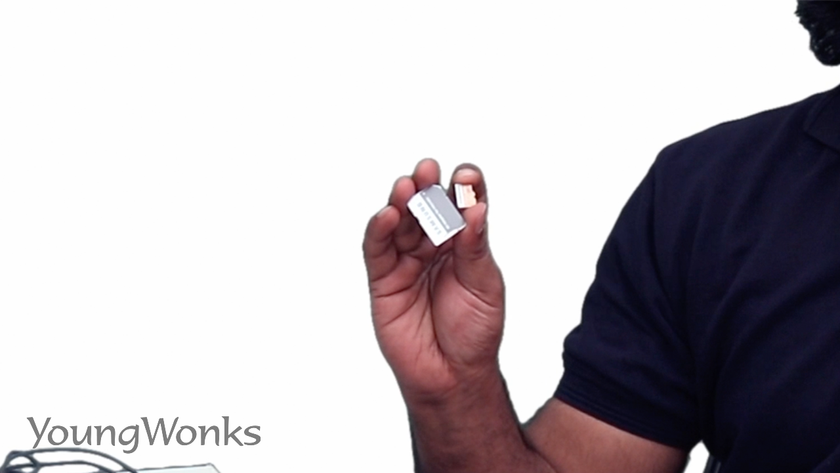
We also need an SD card; a 32GB SD card is recommended. It comes with an SD card adaptor which allows us to load the operating system on to it.
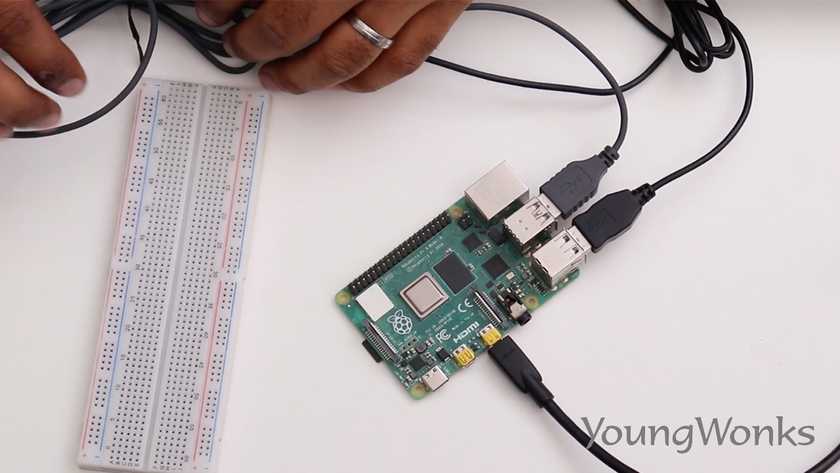
In addition to the above, it becomes easy to set up if one has a keyboard, a mouse and a monitor to which we can hook up our Raspberry Pi.
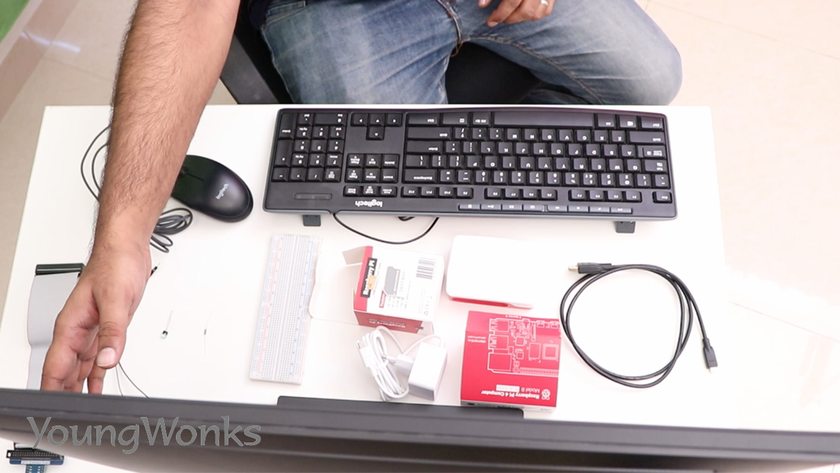
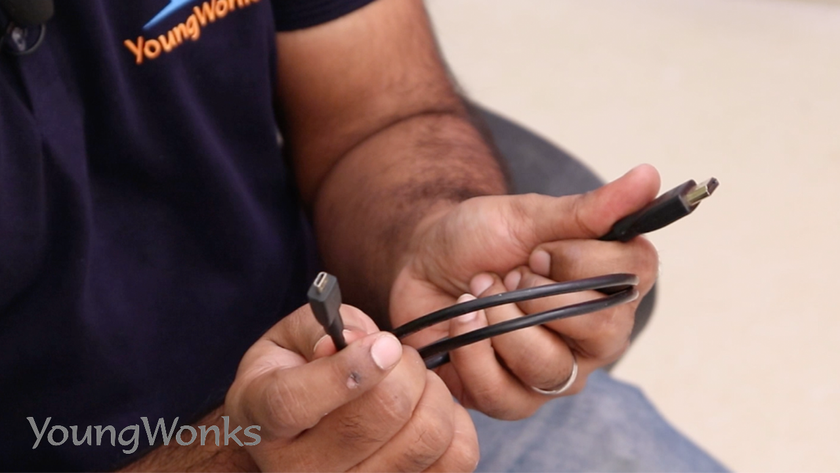
To connect our Raspberry Pi to the monitor, we need an HDMI cable and because this is the Raspberry Pi 4, we have an HDMI to a micro-HDMI cable. With Raspberry Pi 3 B+, we would use a regular HDMI cable.
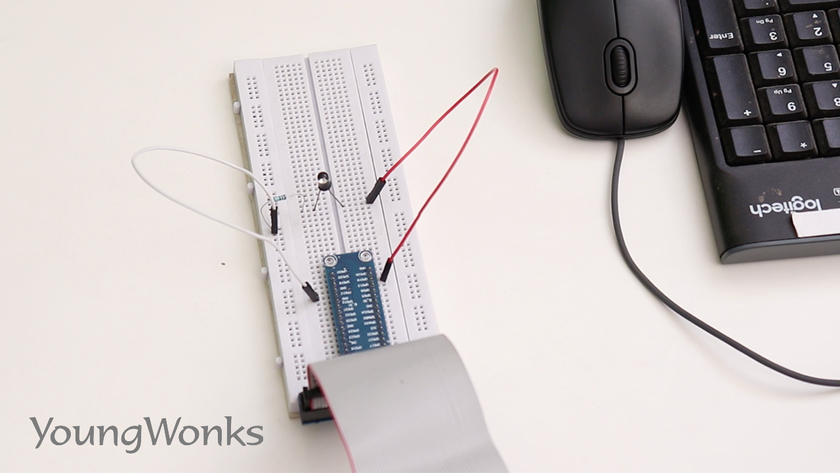
Now let us look at the other requirements for the circuit and for the first program; we need a breadboard, a GPIO extension, a resistor, an LED and two wires.
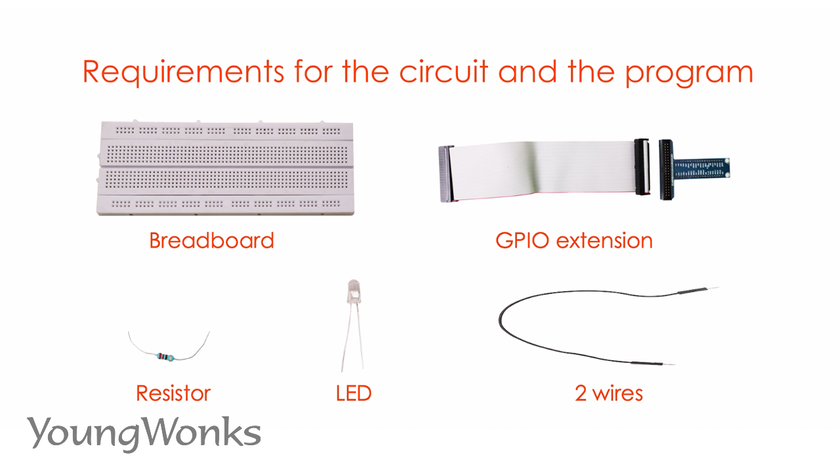
One can buy the above components as a kit or one can procure them individually.
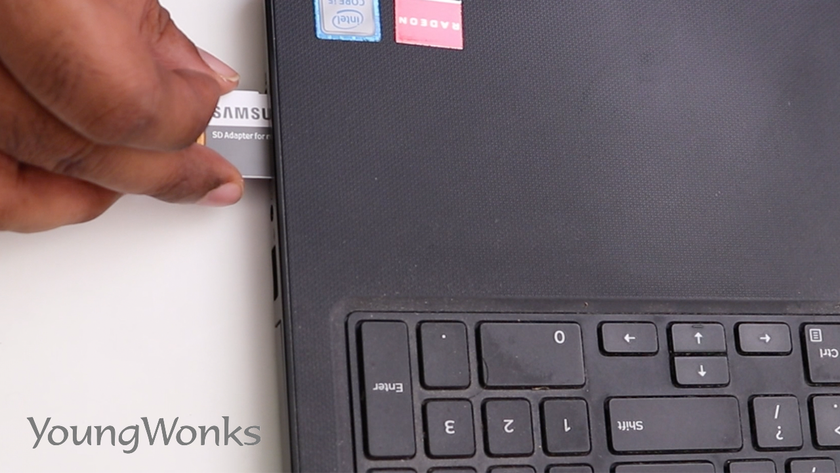
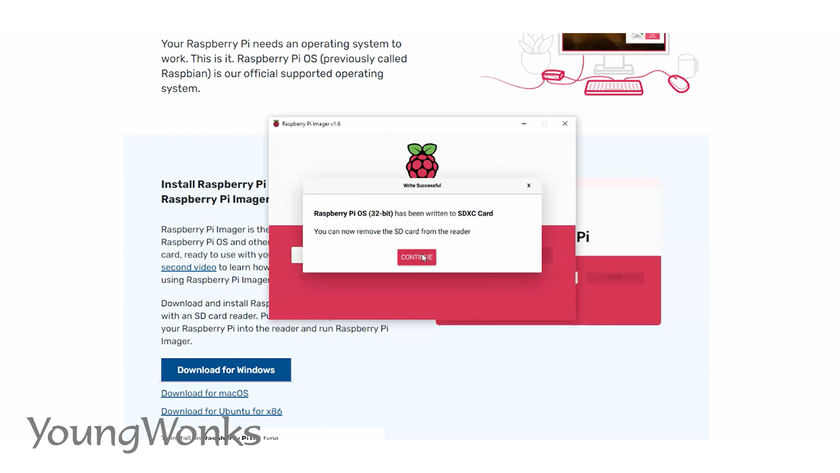
Now we have to get started by loading our OS onto the SD card, which we can then plug into the Raspberry Pi 4. 
To do this, first we insert the SD card into the laptop’s SD card slot.
Then we go to the Raspberry Pi website (https://www.raspberrypi.org/), go under the Software section and download the Raspberry Pi imager software (it is available for Windows, Mac and Ubuntu OSes and the procedure remains the same across them all).
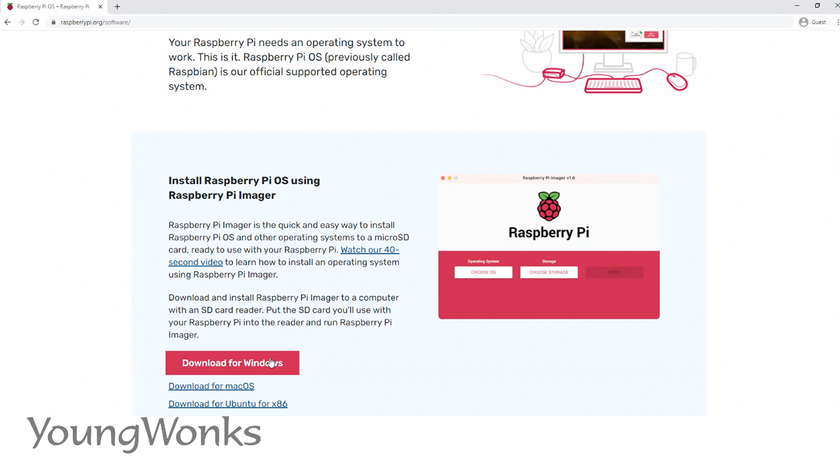
Once it is downloaded, one can install it (also accept the defaults). 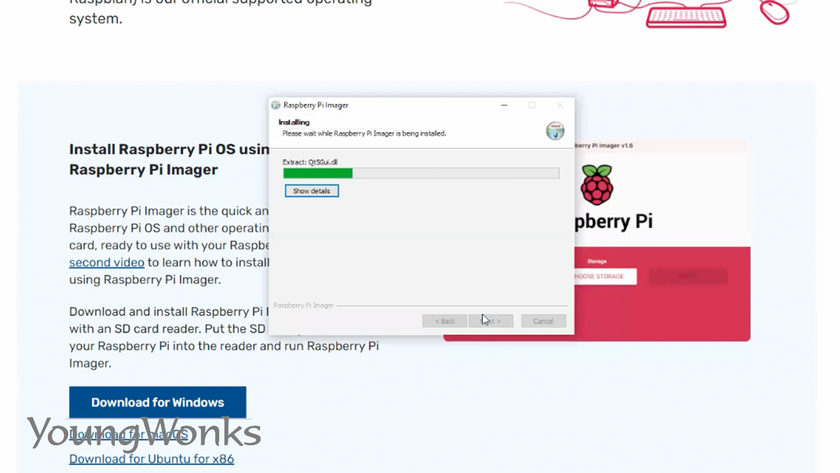
Now you can run the imager; the cool thing about it is that it also downloads the OS for you once you have chosen it.
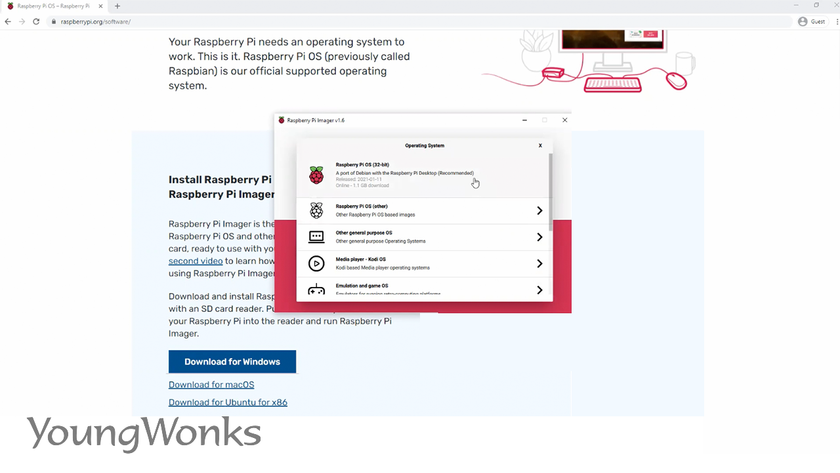
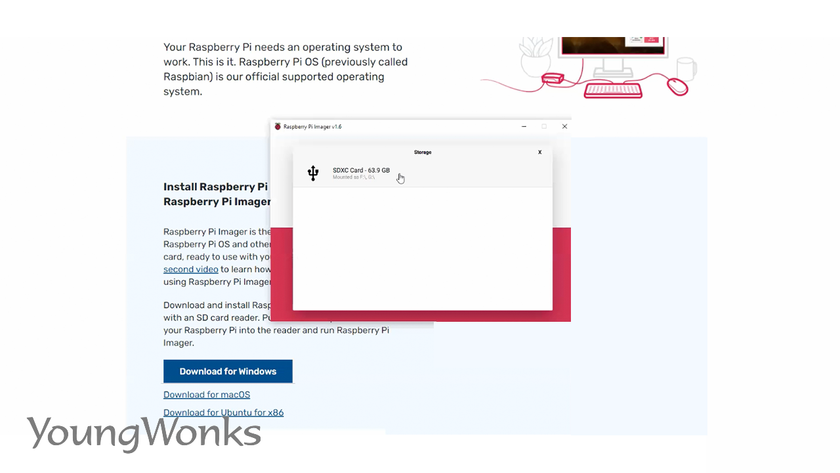
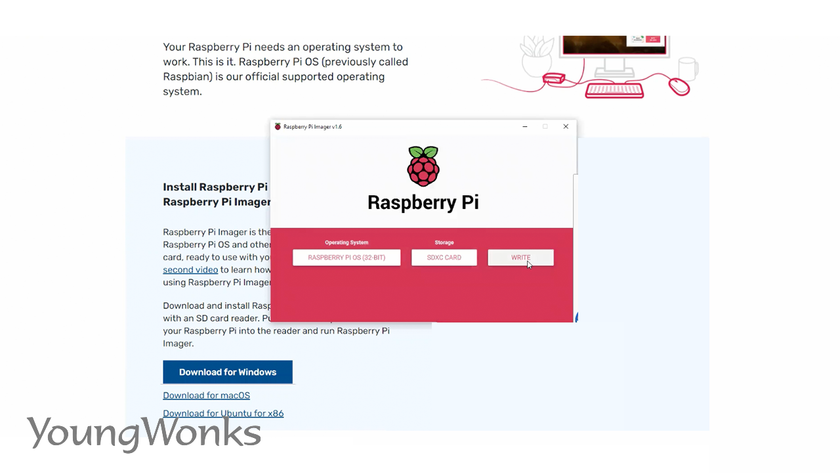
We choose the recommended basic one and it gives a choice of the SD card; here we have used a 32 GB card (there’s also a 64 GB one).
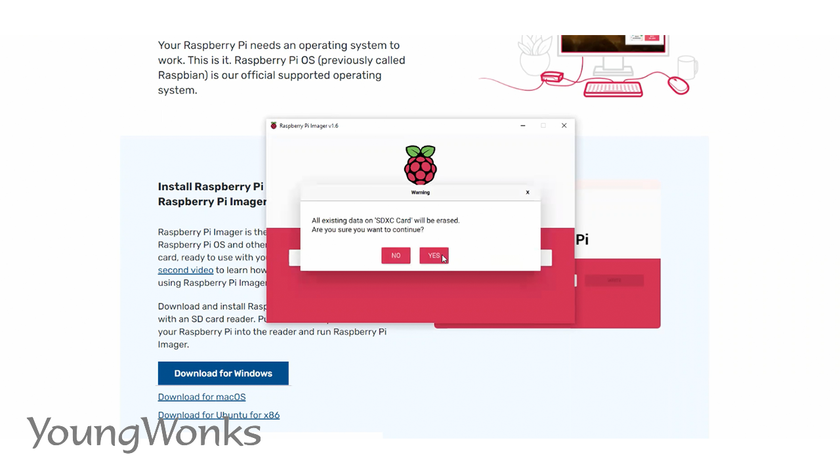
Next you click on the option Write; this will erase any existing data on the SD card.
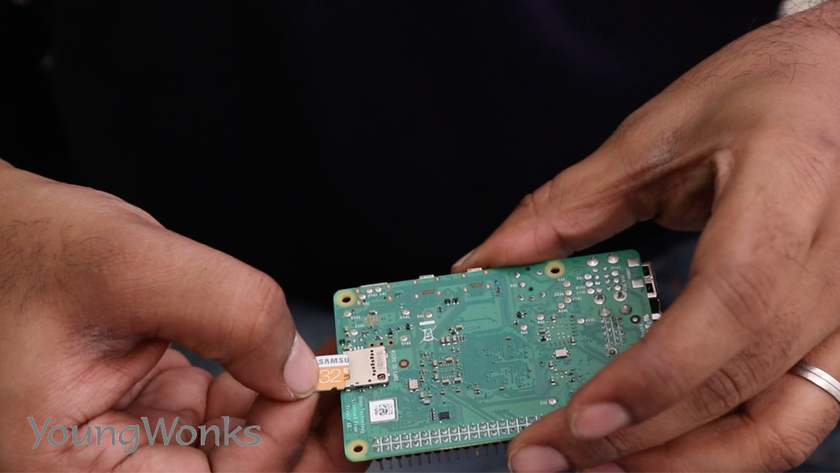
Now that we have the OS on the SD card, we can insert it into the Raspberry Pi’s slot at the bottom. Make sure you put in the card with the golden connectors facing towards the board.
Next we connect our HDMI cable to the Raspberry Pi. 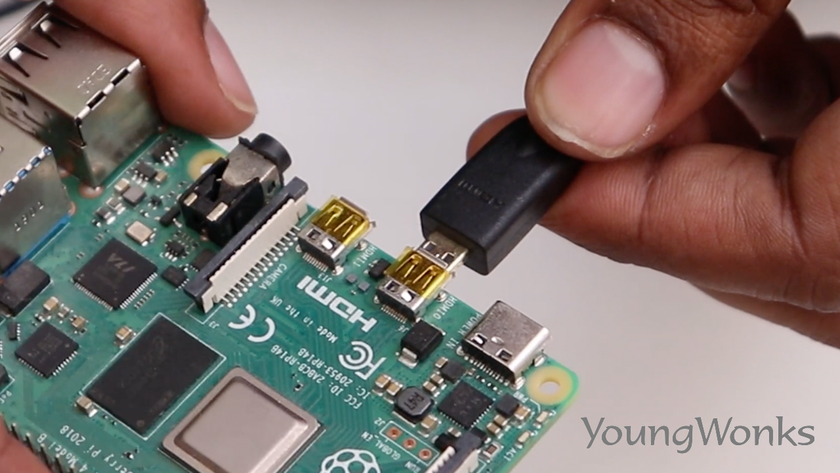
We also connect the mouse and the keyboard, that should be enough to get our Raspberry Pi up and running.
Now we move on to making some connections, so we will be connecting the GPIO extension or the Raspberry Pi cobbler to the Pi.
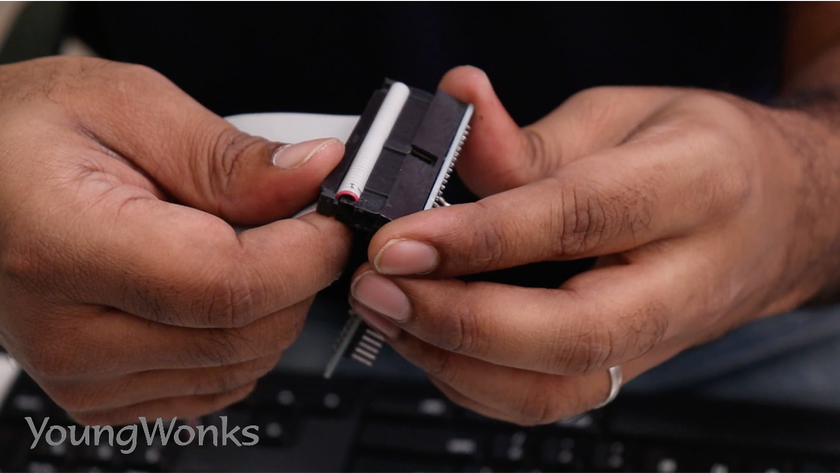
This extension goes on to the 40 pins of the Raspberry Pi; the pink line, if you notice, should be facing pin number 1 which is right at this end.
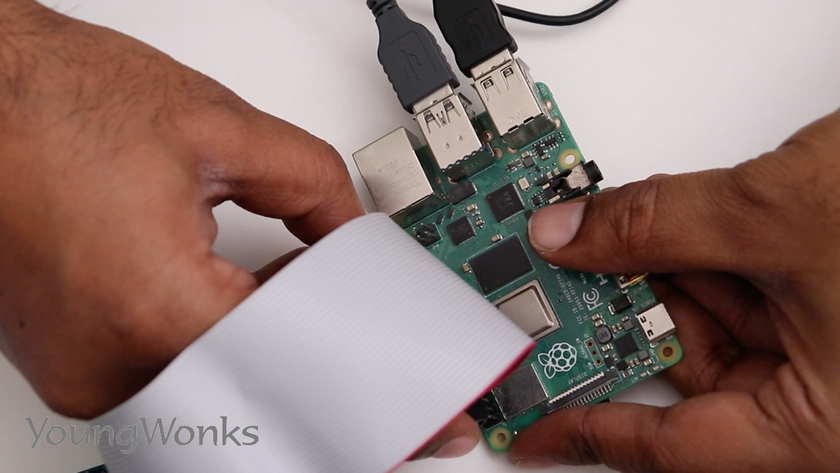
The other end of the GPIO extension goes onto the breadboard and you can notice that the breadboard has some numbers, so you can start at 0 on one of these ends and align it to that. You then just press it in.
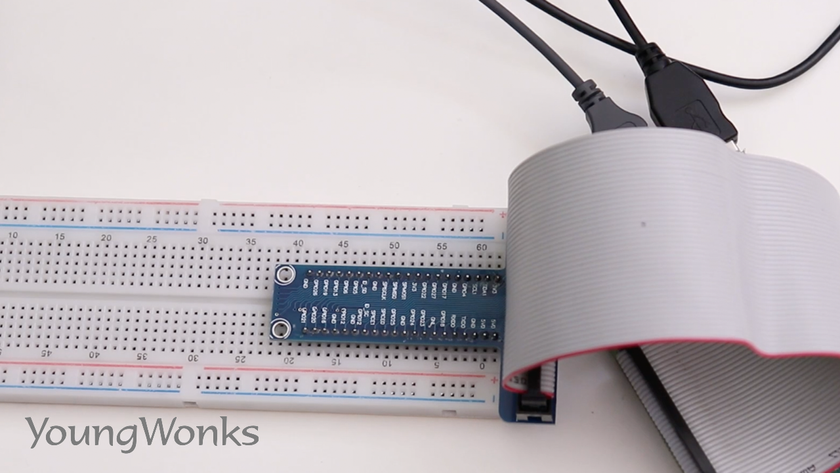
Now this allows us to make our connections right here and the pins are all available to us on the breadboard.
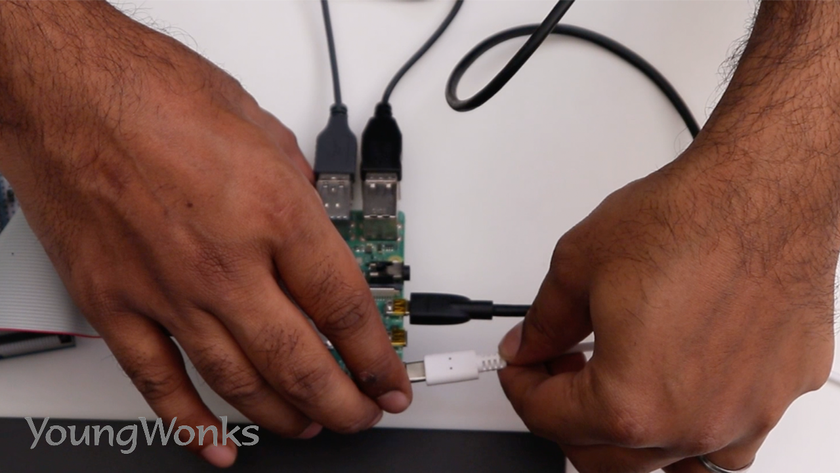
Now we will power on the Raspberry Pi using the official Raspberry Pi charger.
Now you can see on the monitor the Raspberry Pi boot up and it will take you to the home screen where the first thing you have to do is to connect to our WiFi. This allows us to remotely connect to our Raspberry Pi without a monitor.

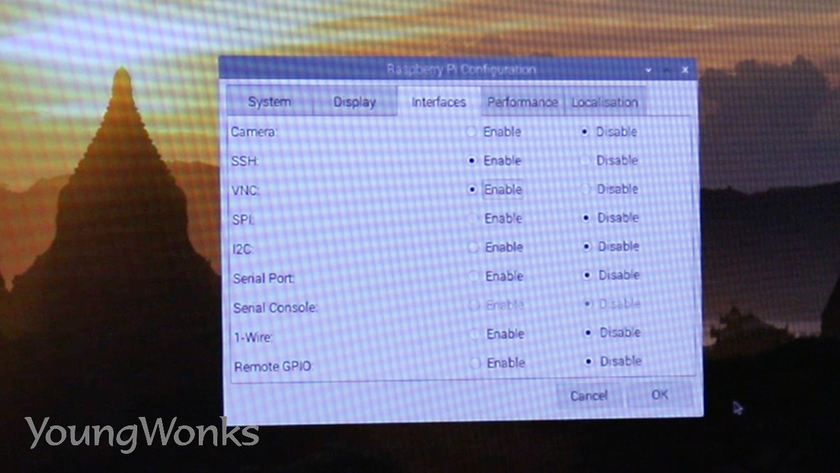
Next we edit the Raspberry Pi configuration to allow remote connections through VNC (Virtual Network Computing). VNC is basically a graphical desktop-sharing system that uses Remote Frame Buffer protocol to remotely control another computer. It relays the keyboard and mouse input from one computer to another, transmitting the graphical-screen updates over a network.
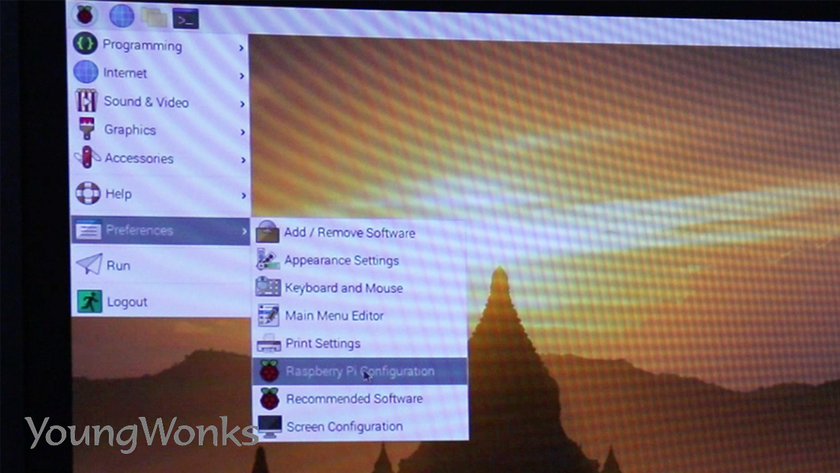
The VNC option is on the Interfaces tab under Raspberry Pi configuration. We enable SSH (Secure Shell Protocol, a cryptographic network protocol for operating network services securely over an unsecured network) and VNC.
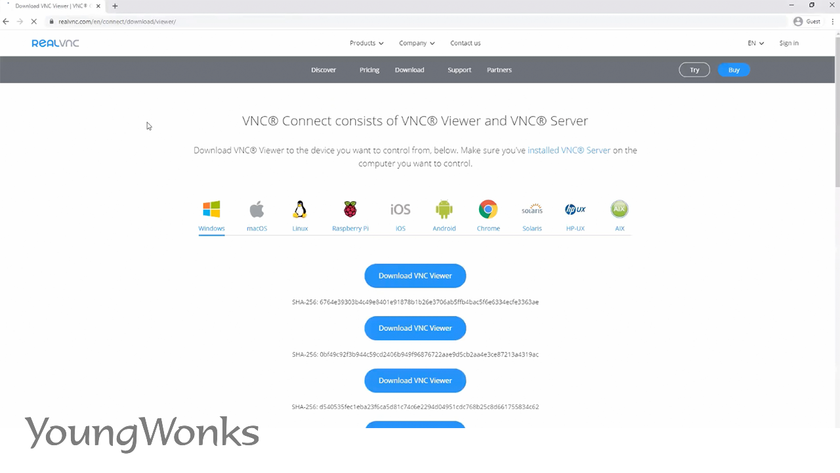
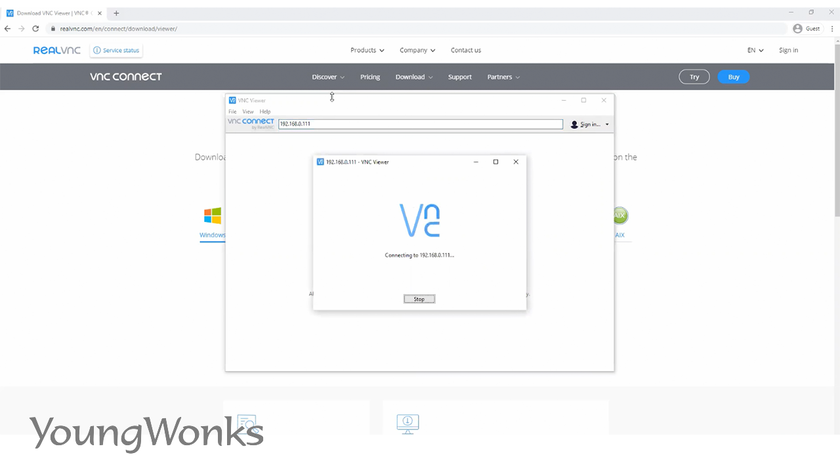
Now we download on our computer the VNC viewer from its website (www.realvnc.com).
This is available for multiple platforms and we have used here the standard 64 bit one which doesn’t really need an installation but one can select any of these.
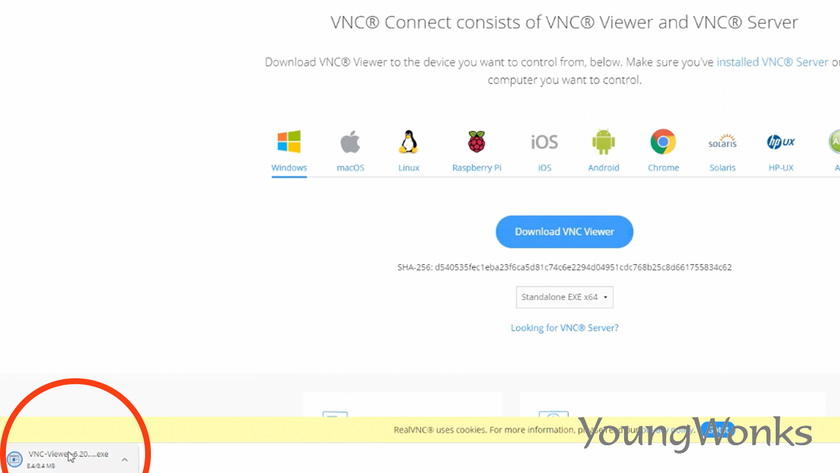
Then you download the VNC viewer and launch it. We now need to connect to the Raspberry Pi by using its IP address.
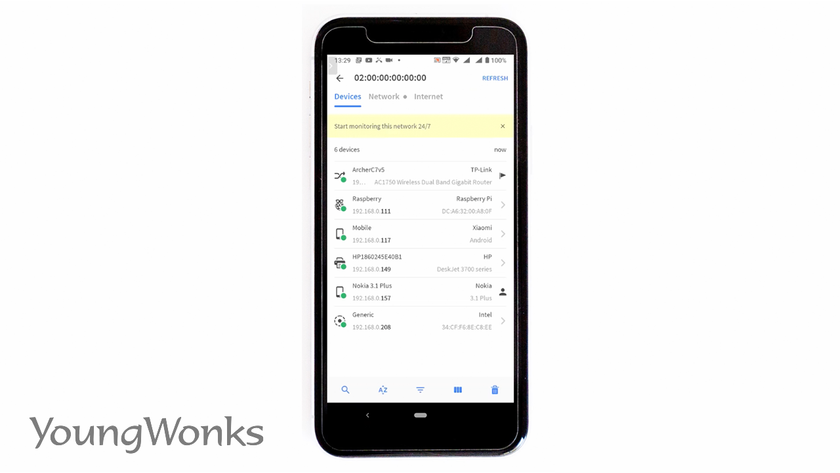
One can detect the IP address using a Fing mobile app or also when we had the Raspberry Pi connected to the monitor.
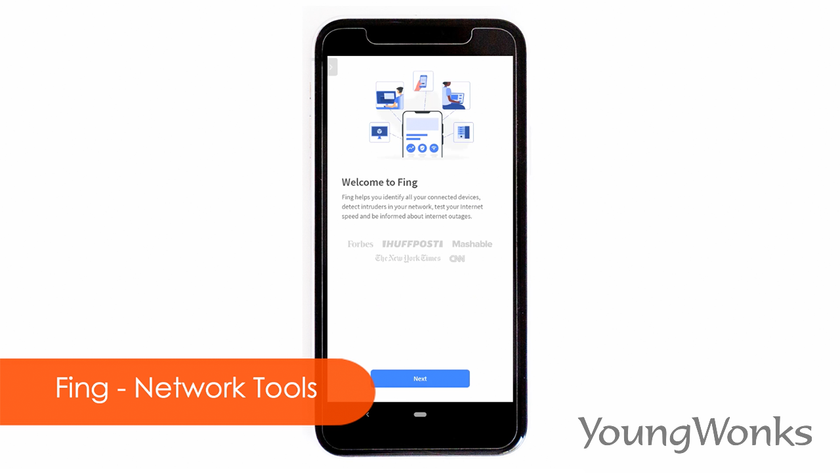
Once you have created the account on Fing, you set up that account and go through the defaults before you detect the IP address as shown here.
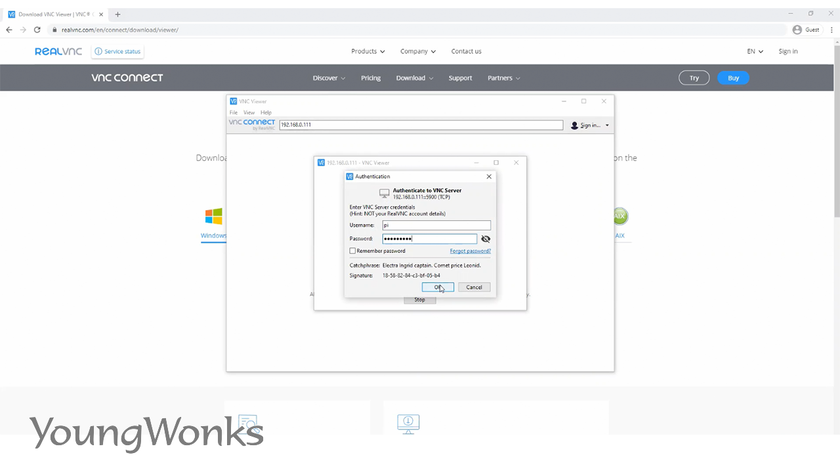
You then connect the VNC viewer to that IP address.
Put in the default credentials which are Pi and Raspberry which will allow us to connect to our Raspberry Pi right from our laptop and we no longer need the monitor, the keyboard or the mouse.
Now to build a circuit to blink an LED, we connect the resistor to the ground pin and we connect the positive of the LED to a GPIO pin.
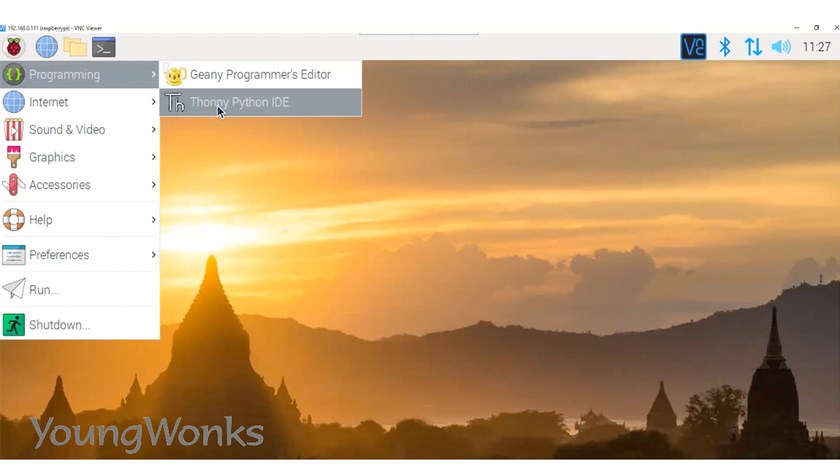
In terms of the code, we now open Thonny Python IDE.
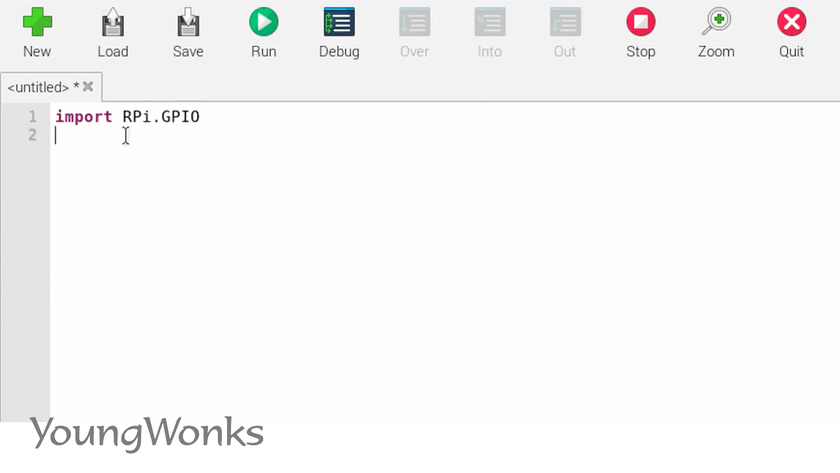
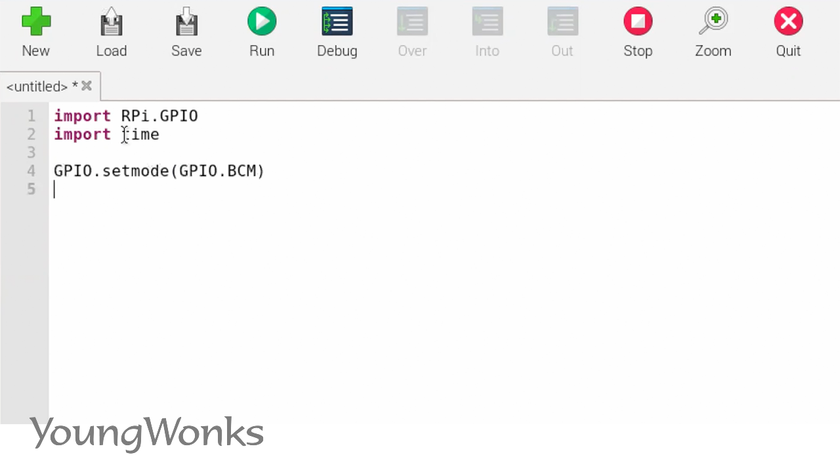
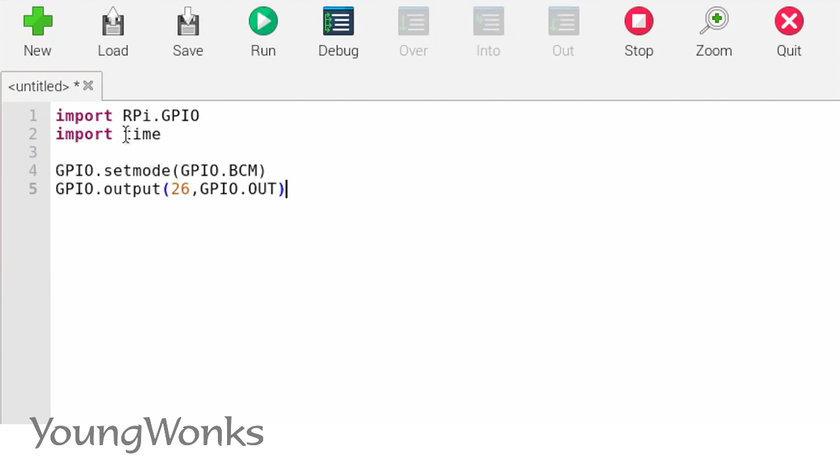
Next we start by importing the GPIO library which is done by typing import RPi.GPIO as GPIO.
Then import the time library to add some delays.

Set the pin mode to BCM which allows us to refer to it just by using the GPIO numbers.
We set pin 26 as an output.
In a while true loop, we will turn on the LED, wait for a second, turn off the LED and wait for another second. Another important point is that we also add a GPIO cleanup so it doesn’t remember any values that were set.
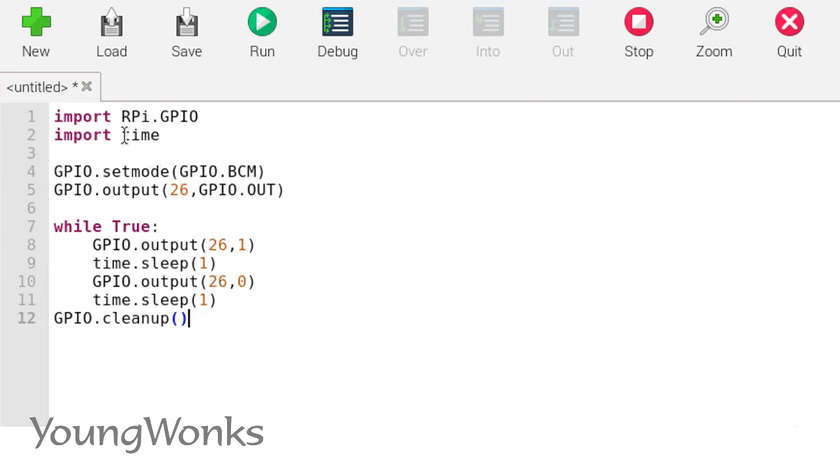
Don’t forget to add the 'as GPIO' at the top of the program.
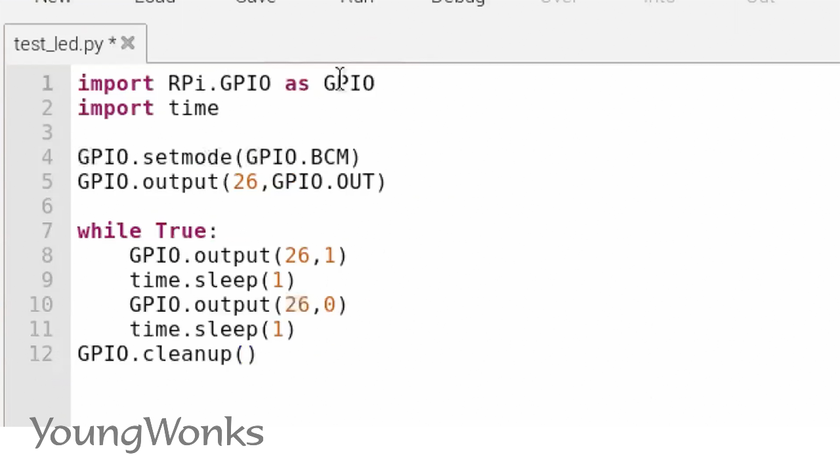
Now we can see the LED blink.

Watch the video below to see how one can get started with the Raspberry Pi 4:
Bridging Technology and Learning with YoungWonks
The Raspberry Pi 4 is a powerful yet affordable mini computer that has revolutionized learning and building in the tech world. For children and beginners eager to explore the vast potential of this device, our Coding Classes for Kids offer a comprehensive introduction. Whether it's creating projects from scratch or understanding the basics of programming, our Python Coding Classes for Kids provide the perfect foundation. For those looking to expand their skills into hardware and game development, our Raspberry Pi, Arduino and Game Development Coding Classes are tailor-made to inspire and educate. Through this engaging platform, students not only learn the technical skills needed to succeed but also develop a love for innovation and creativity.
*Contributors: Written by Vidya Prabhu; Lead image by: Leonel Cruz