Apr 22, 2021 By Team YoungWonks *
How can one control a DC motor with the Raspberry Pi Pico? In this blog, we shall look at this. But before we go into that, let’s look at what a DC motor is.
What is a DC motor?
DC motors are essentially electrical motors that convert direct current electrical energy into mechanical energy. Among DC motors, brushed DC motors are the most popular type of motor, primarily because they are cost effective to produce, lightweight, easy to control, fairly efficient and have excellent torque at low speeds. Meanwhile, brushless DC motors use permanent magnets in their rotor assembly and are thus mechanically much simpler than brushed motors. Stepper motors, on the other hand, are DC motors that move in discrete steps. For more details, check out our blog on different types of motors used by hobbyists and makers today: https://www.youngwonks.com/blog/Different-types-of-motors-used-by-makers-and-hobbyists.
Next let’s take a quick look at the Raspberry Pi Pico.
What is Raspberry Pi Pico?
Raspberry Pi refers to a series of small single-board computers developed in the United Kingdom by the Raspberry Pi Foundation in association with Broadcom. The boards have been made keeping in mind the promotion of teaching basic computer science to kids. The latest offering by Raspberry Pi is the Raspberry Pi Pico, a new flexible IoT board. Essentially, it is a microcontroller board built on silicon and designed at the Raspberry Pi Foundation.
Priced at merely $4, Raspberry Pi Pico is smaller than the average Pi and indicates how the foundation is now looking to branch out into microcontrollers and custom silicon.
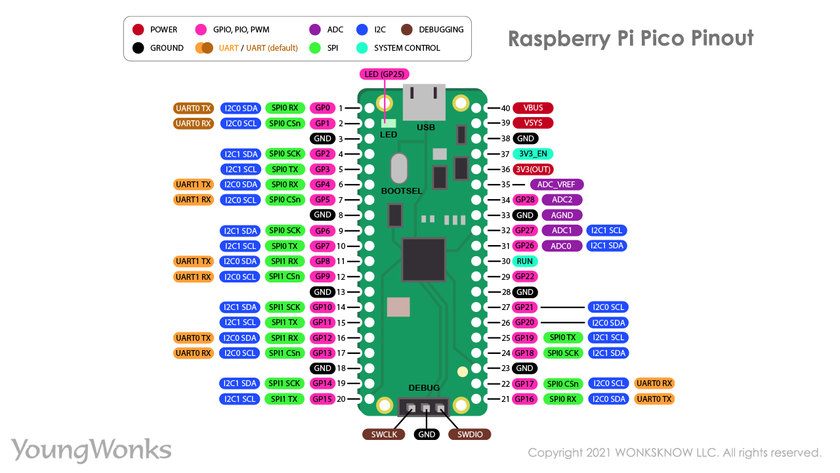
Raspberry Pi Pico pinout
In order to use it well, it is recommended to get well acquainted with the Raspberry Pi Pico pinout. The diagram below explains this.
Raspberry Pi Pico projects
As a microcontroller, the Raspberry Pi Pico can be used in many projects, be it Internet of Things (IoT), Adafruit Neopixel projects, data logging, small to medium scale robotics, projects needing interfacing with cameras, analog sensing (using environment sensors) and more.
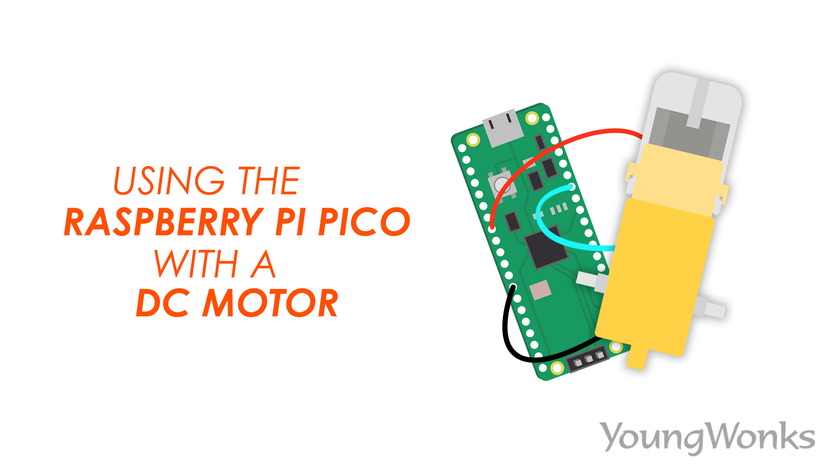
Using a DC motor with a Raspberry Pi Pico
Now we are going to see how to program a DC motor with a Raspberry Pi Pico.
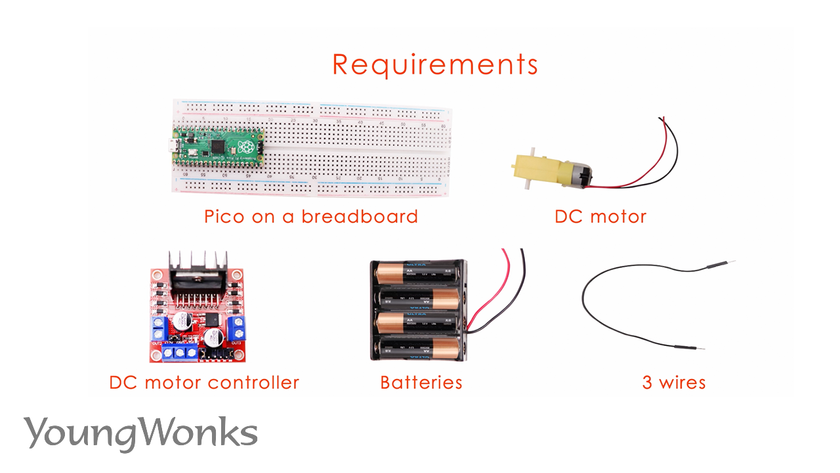
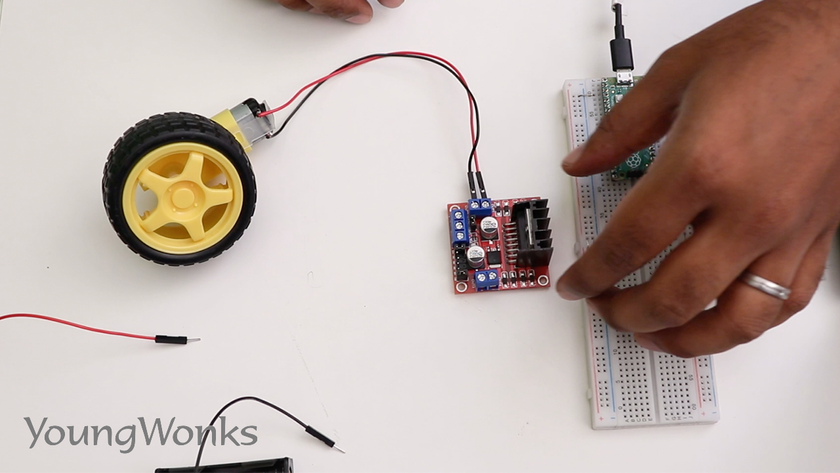
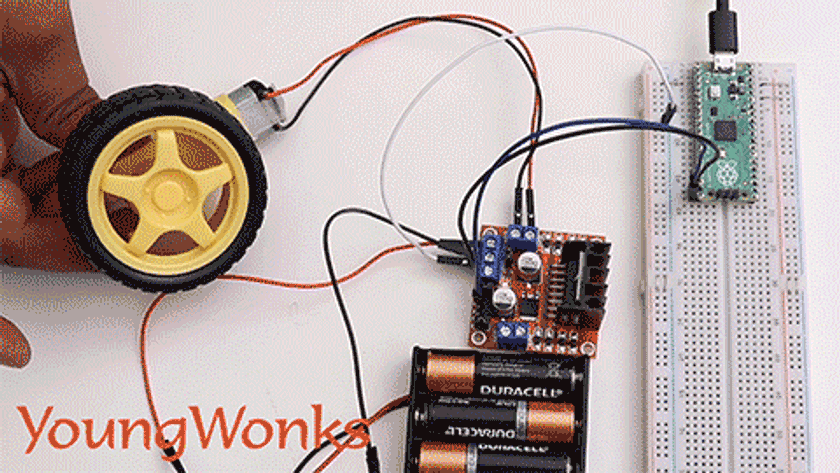
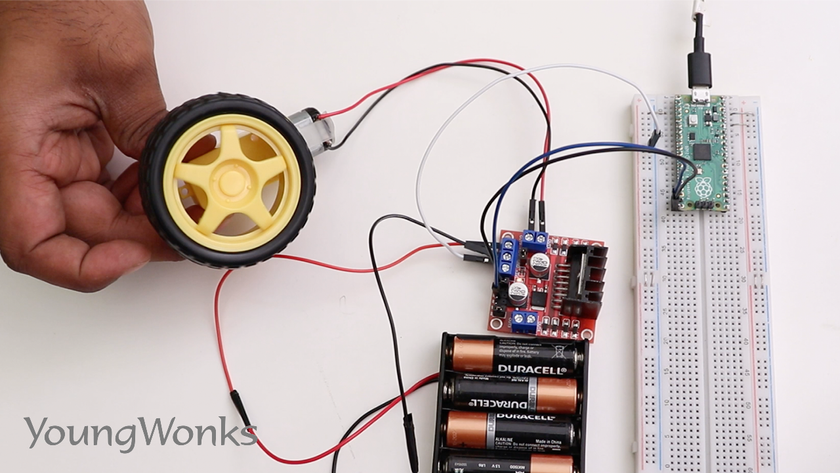
In order to do this, we need a Raspberry Pi Pico on a breadboard, a DC motor, a DC motor controller, some batteries and three wires.
Take a look at this circuit diagram to help you build a circuit. 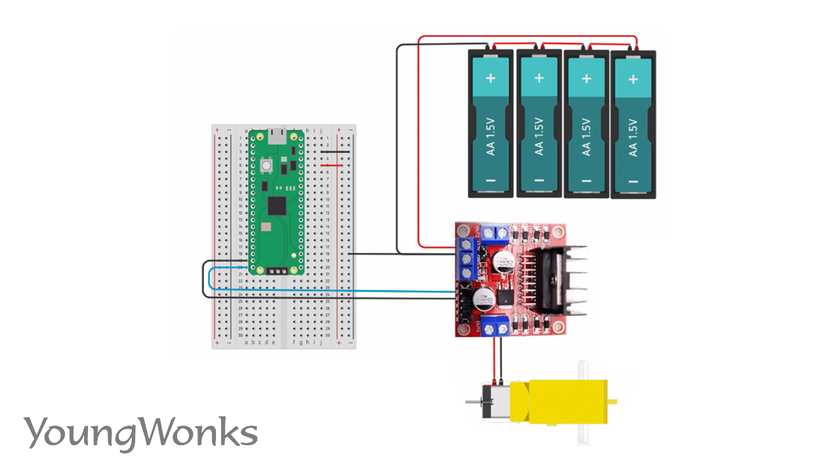
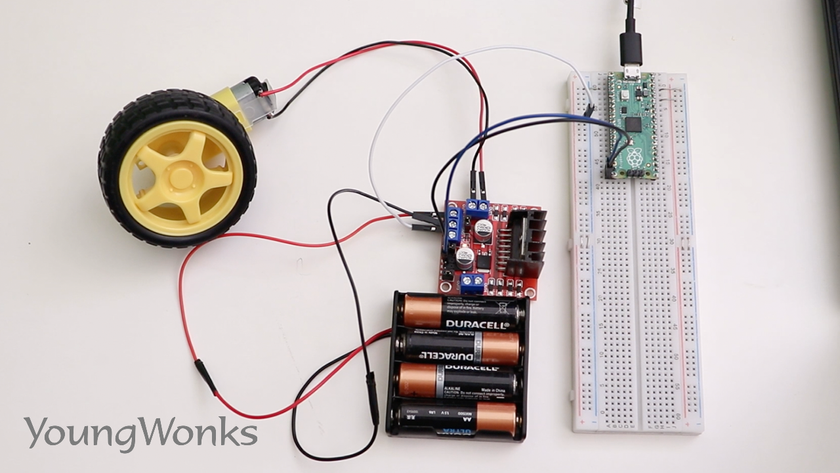
Verify your connections by using this wiring circuit. 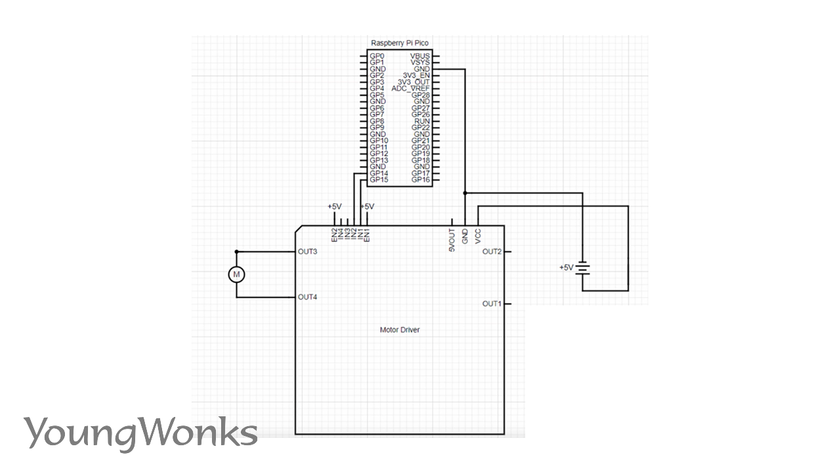
Now we start by making our connections; we shall connect the motor to the motor driver.
Then connect the GPIO pins that we are going to use to control this motor. 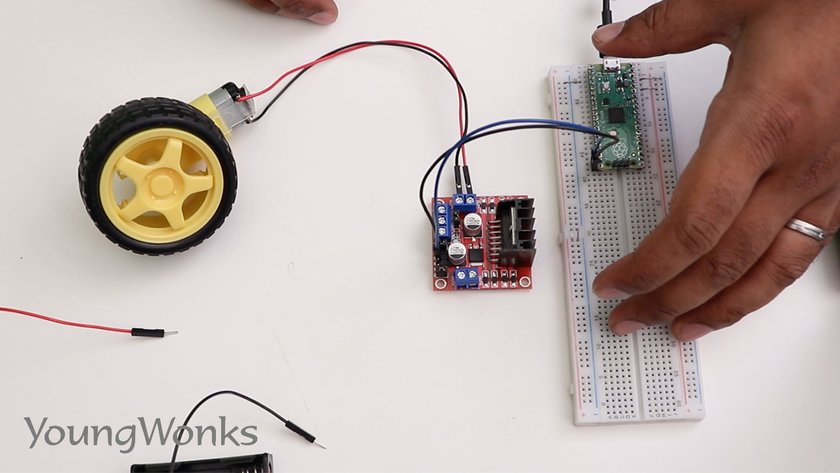
Next we connect the ground and finally make the power connection to the motor driver.
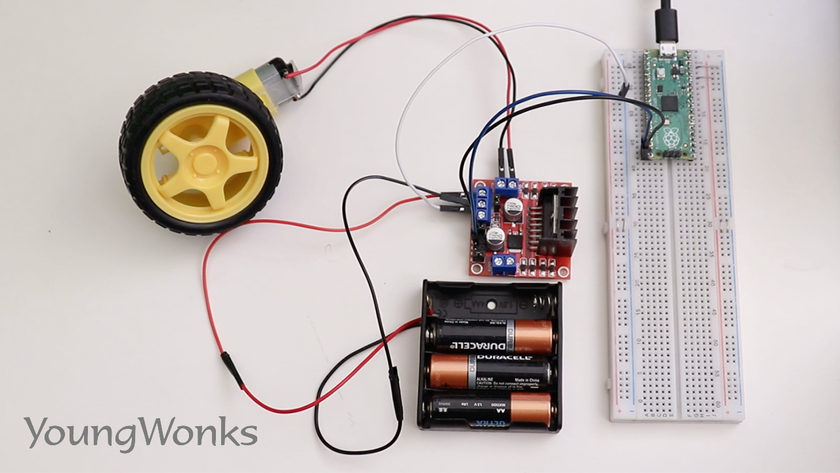
Note that it’s safer to keep a battery out until we do this, so we plug in the last battery and see the light turn on in the motor driver.
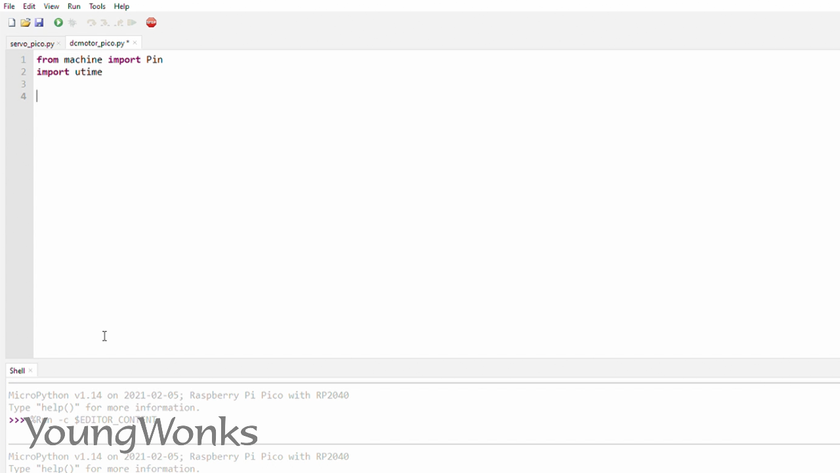
Moving on to the code, as usual we import the pin module from the machine library and add utime to be able to add delays.
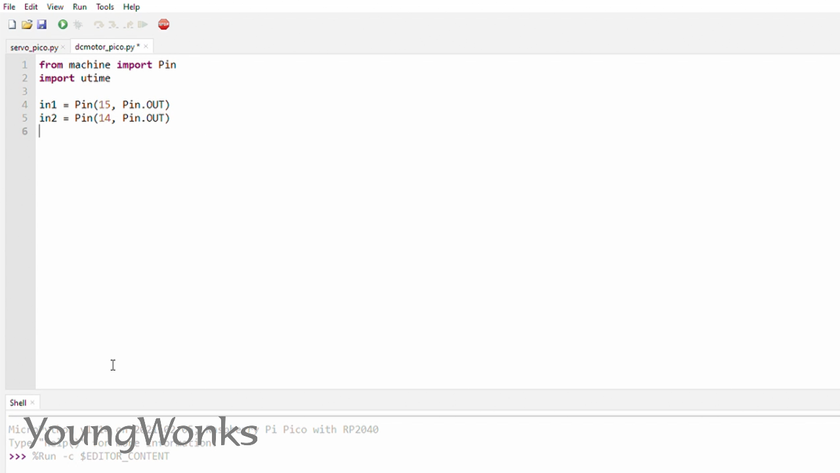
We then set up two pins as outputs, in our case they are 14 and 15.
Now in a while loop, we will set all the different combinations that we can on these two pins; so they could be 0-0, 0-1, 1-0, or 1-1.
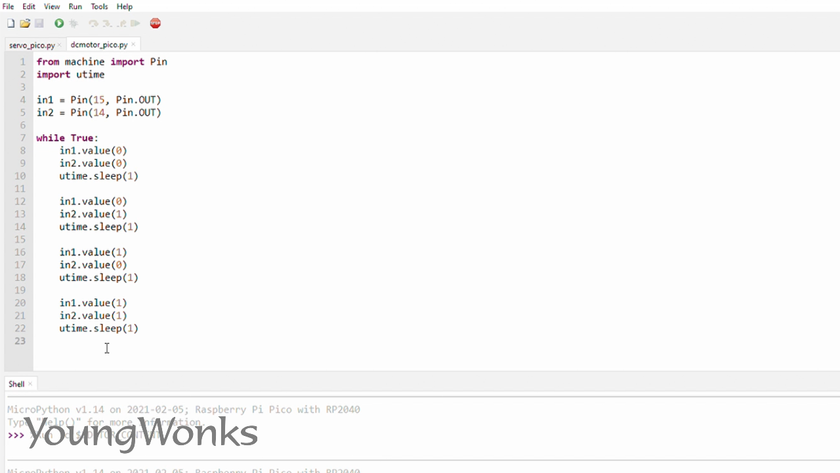
You’ll notice that the motor turns only for the combinations 0-1 and 1-0.
The motor doesn’t turn for the combinations 0-0 and 1-1.
You can watch the video below to take a quick look at how one can use a DC motor with a Raspberry Pi Pico:
Further Learning Resources
After mastering the basics of operating a DC motor with the Raspberry Pi Pico, aspiring young engineers and inventors may wish to expand their knowledge and skills further. For those interested in exploring more about programming and electronics, Coding Classes for Kids at YoungWonks offer an excellent starting point. For enthusiasts keen on delving deeper into programming with one of the most versatile and popular languages, our Python Coding Classes for Kids provide a solid foundation. Additionally, for students who are eager to learn more about hardware like the Raspberry Pi, as well as Arduino and even game development, our Raspberry Pi, Arduino and Game Development Coding Classes can help turn curiosity into expertise. Through these comprehensive courses, YoungWonks paves the way for the next generation of tech wizards.
*Contributors: Written by Vidya Prabhu; inputs and demo by: Suchin Ravi; Lead image by: Leonel Cruz