Apr 08, 2021 By Team YoungWonks *
How can one control a servo motor with the Raspberry Pi Pico? In this blog, we shall look at this. But before we go into that, let’s look at what a servo motor is.
What is a servo motor?
A popular hobby market motor, the servo motor can push or rotate an object with great precision and is thus quite useful for projects that require precise control of angular or linear position, velocity and acceleration. If you need to rotate and object at some specific angles or distance, then you use a servo motor, which in turn is made up of a simple motor running through the servo mechanism. The servo mechanism comprises three parts; first is the controlled device, second is the output sensor and lastly, the feedback system. In this closed loop system, a positive feedback system is used to control motion and the final position of the shaft. The device is controlled by a feedback signal produced by comparing output signal and reference input signal. For more details, check out our blog on different types of motors used by hobbyists and makers today: https://www.youngwonks.com/blog/Different-types-of-motors-used-by-makers-and-hobbyists.
Next let’s take a quick look at the Raspberry Pi Pico.
What is Raspberry Pi Pico?
Raspberry Pi refers to a series of small single-board computers developed in the United Kingdom by the Raspberry Pi Foundation in association with Broadcom. The boards have been made keeping in mind the promotion of teaching basic computer science to kids. The latest offering by Raspberry Pi is the Raspberry Pi Pico, a new flexible IoT board. Essentially, it is a microcontroller board built on silicon and designed at the Raspberry Pi Foundation.
Priced at merely $4, Raspberry Pi Pico is smaller than the average Pi and indicates how the foundation is now looking to branch out into microcontrollers and custom silicon.
Raspberry Pi Pico pinout
In order to use it well, it is recommended to get well acquainted with the Raspberry Pi Pico pinout. The diagram below explains this. 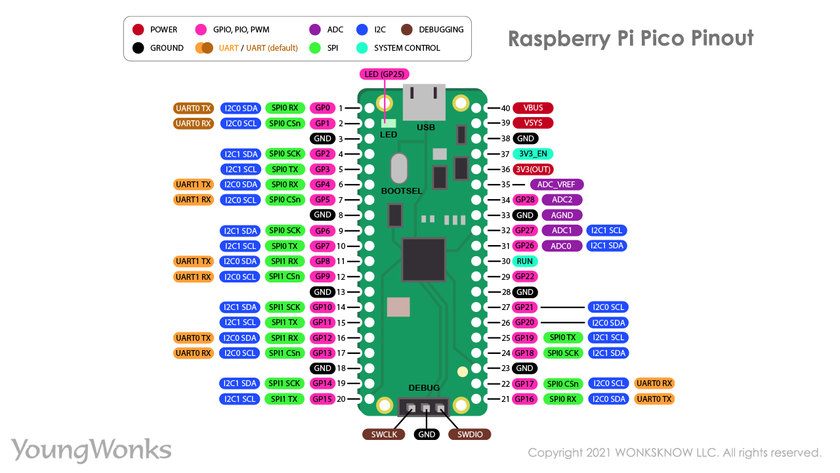
Raspberry Pi Pico projects
As a microcontroller, the Raspberry Pi Pico can be used in many projects, be it Internet of Things (IoT), Adafruit Neopixel projects, data logging, small to medium scale robotics, projects needing interfacing with cameras, analog sensing (using environment sensors) and more.
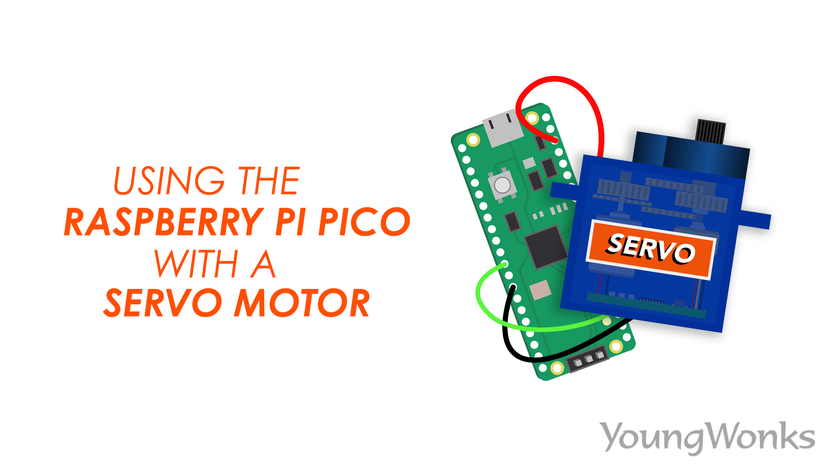
Using a servo motor with a Raspberry Pi Pico
Now we are going to see how to control a servo motor with a Raspberry Pi Pico.
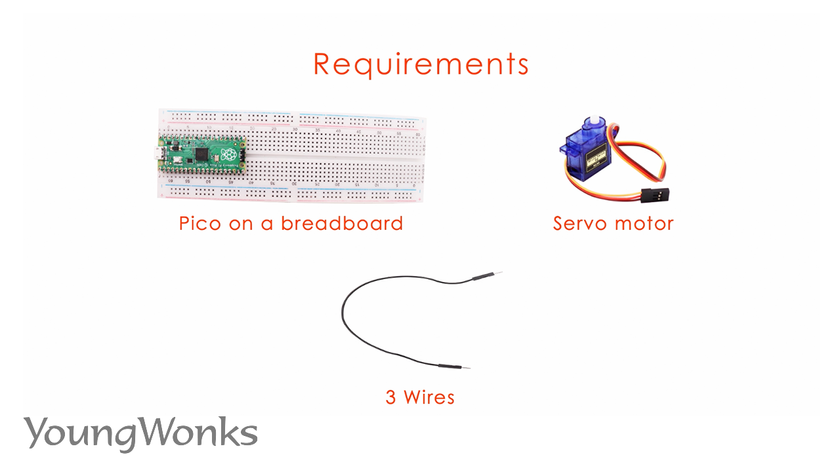
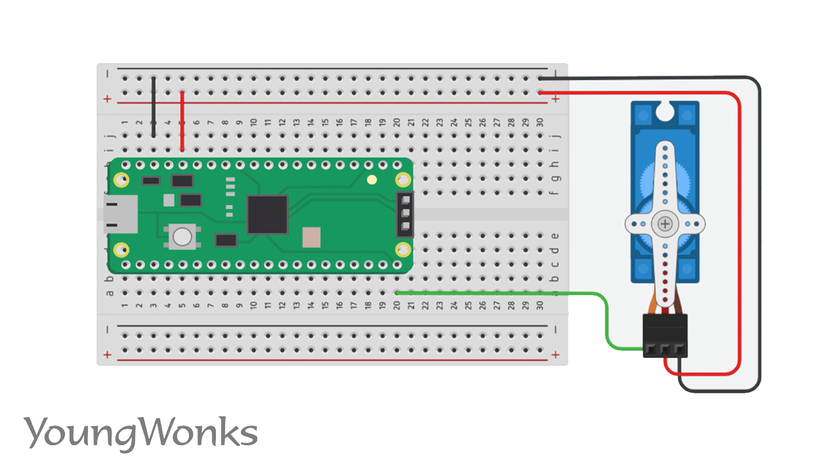
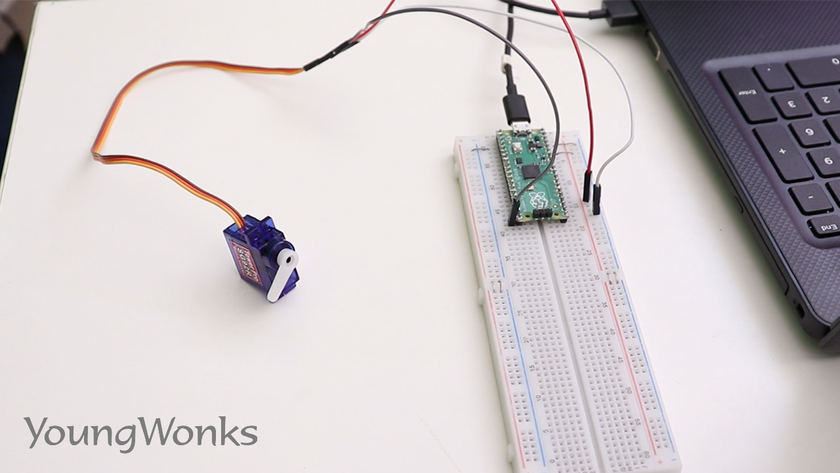
For this, we need a Raspberry Pi Pico on a breadboard, a servo motor and a few wires.
Use this circuit diagram to help you build a circuit.
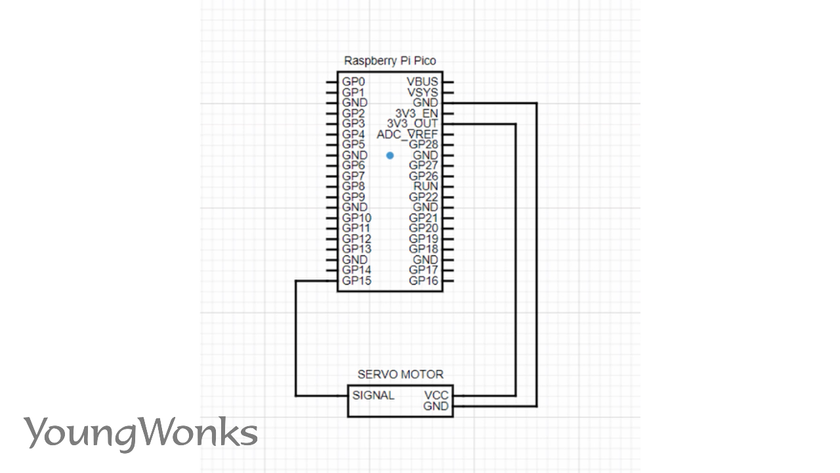
One can also verify your circuit using this wire diagram.
The connections here are fairly easy to make, so we first connect our signal pin to servo.
Then we connect it to a ground and then we connect a VCC (a signal pin that is a GPIO configured as output).
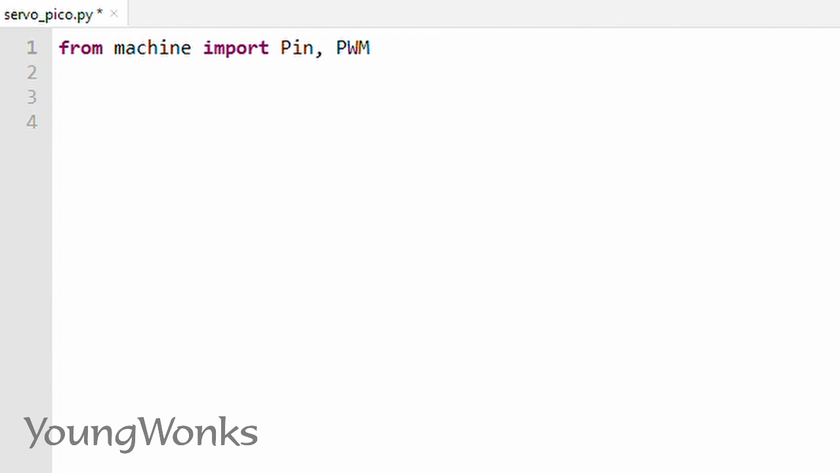
Now that we have built the circuit, it’s time to get down to the code. First we will import both Pin and PWM from the machine library.
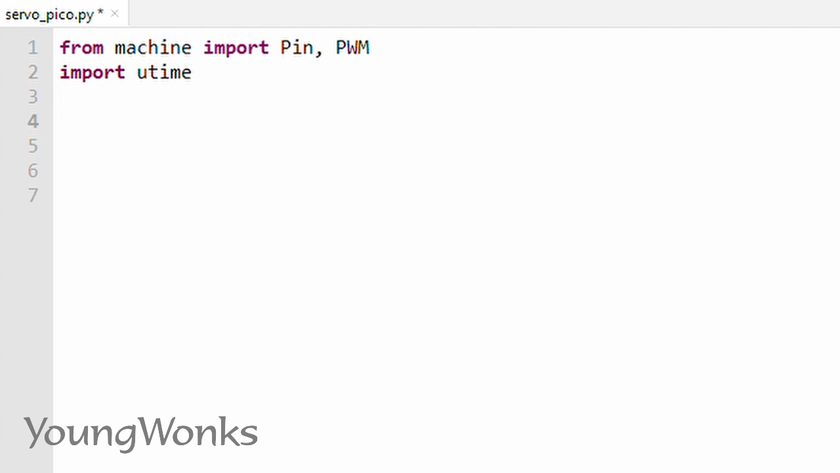
We will also import utime to be able to add some delays.
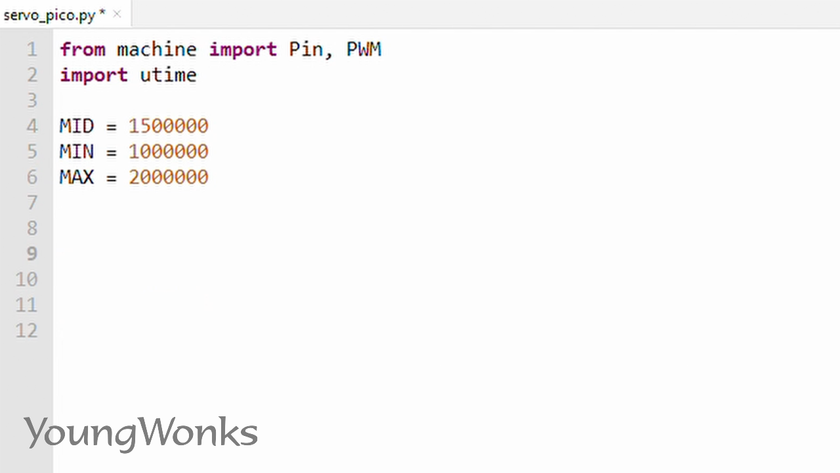
Next we set up three constants which are in nanoseconds indicating the min position, the max position and the mid position of the servo.
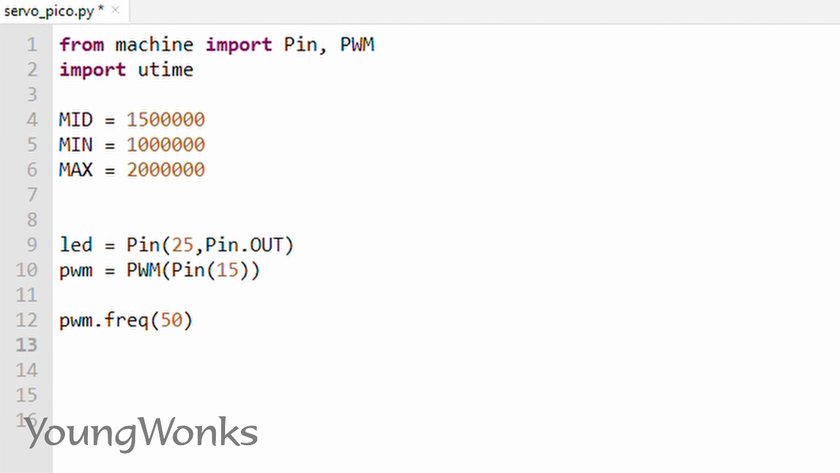
We then create a pin configured as a PWM and also set its initial frequency to 50.
We then set its initial duty cycle to the mid position.
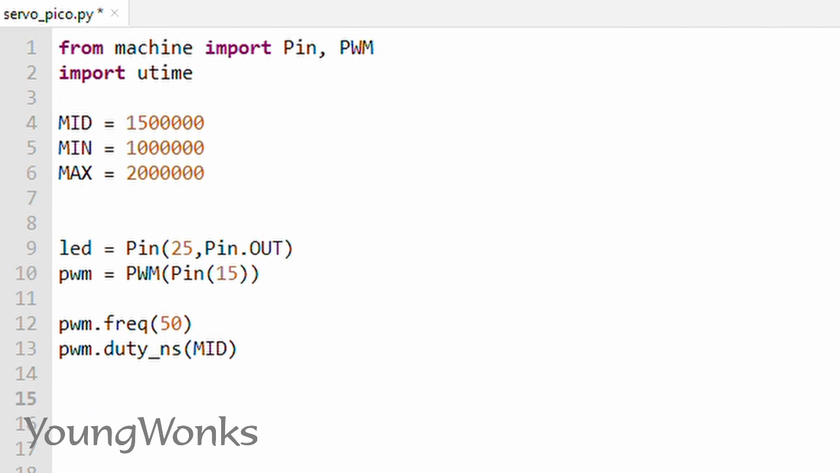
Then in a while true, we set its duty cycle to the min. Next we wait for a second, change it to the mid, followed by waiting for another second, changing it to the max and then again waiting for a second. 
Now when we run this program, we will be able to see our servo motor switch between the three positions.
This program will come in handy for many projects including a pan and tilt for your robot car or a camera.
You can watch the video below to take a quick look at how one can use a servo motor with a Raspberry Pi Pico:
Enhance Learning with YoungWonks
To get the most out of your project on how to use a servo motor with the Raspberry Pi Pico, consider enrolling in Coding Classes for Kids offered by YoungWonks. These classes are specially designed to provide kids with the foundation in technology that they will need to excel in such projects. For those particularly interested in the language behind this project, Python Coding Classes for Kids are available, which can strengthen their understanding and application of Python in various projects including Raspberry Pi ones. Furthermore, to explore more about the integration of hardware with software, the Raspberry Pi, Arduino and Game Development Coding Classes can be the perfect next step. These courses are designed to broaden their skill set, covering a broad range of topics from hardware integration with Raspberry Pi and Arduino to game development.
*Contributors: Written by Vidya Prabhu; Lead image by: Leonel Cruz